System Breakdown:
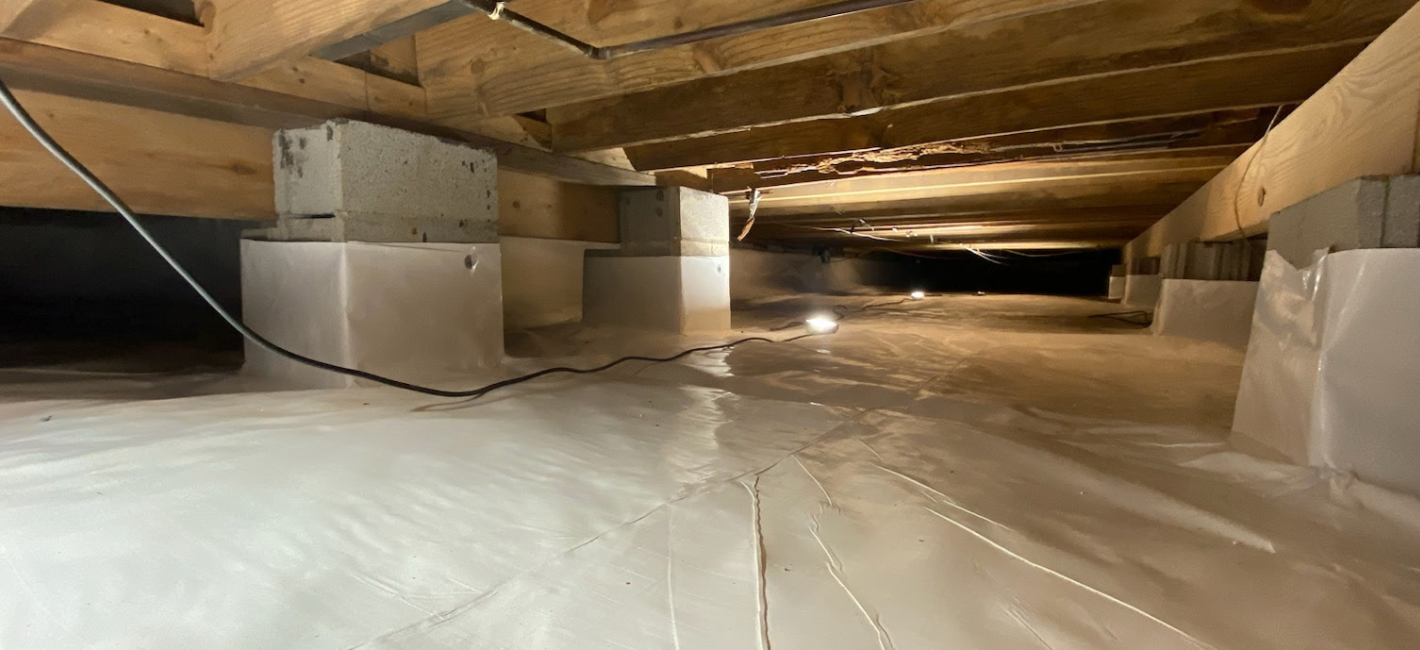
Complete 4-Step System
BIOShield™ combines professional debris removal, manual joist wiping with Benefect Decon 30, perimeter water drainage, 16-mil vapor barrier encapsulation, and self-regulating dehumidification to seal your crawl space permanently.
Clear & Decontaminate
We start by fully clearing the crawl space. That means removing all debris — rocks, trash, leftover storage, building materials, and the scraps other trades leave behind (old HVAC installers are a frequent culprit) — along with all existing fiberglass insulation.
With the space cleared, we treat every joist with Benefect Decon 30, applied by sprayer. But spraying alone isn't enough. Fogging and spraying only hit the surface, so we hand-wipe every joist with microfiber towels. That physical agitation is what lets the Decon 30 reach the mold at its roots and kill it — not just mask it.
Throughout the first two days, we run temporary HEPA air scrubbers to keep the air clean while we work:
- One inside the home, protecting your family's indoor air quality while insulation is disturbed and mold is treated below — so you don't have to leave during the process.
- One inside the crawl space, protecting our crew and capturing contaminants at the source before they can migrate up into your living space.
Water Management & Insulation
Mold is a moisture problem first, so we manage the water before we seal anything.
We trench a perimeter drain inside the crawl space, right next to the footer — roughly 6 to 7 inches deep on the interior side — and install a strip drain around the full perimeter. That drain empties into a 22-gallon sump basin fitted with a 1/3 HP sump pump, set in a corner. The system is plumbed and discharged at least 10 feet from the foundation, exiting through a pop-up emitter so the water leaves the area for good.
We then re-insulate all exterior walls with 2-inch foam board, mechanically attached for a lasting, secure fit.
Vapor Barrier Encapsulation
Next we encapsulate the space with a 16-mil reinforced vapor barrier — virgin (non-recycled) plastic, non-woven, reinforced, and treated with an anti-mold agent for long-term protection.
The barrier runs up the walls over the foam board, tucked and sealed for maximum moisture control, then drapes down onto the floor in one continuous piece — no seams near problem or water-intrusion areas. It's overlapped by the floor plastic for an added layer of protection below, and all seams are taped with 4-inch reinforced seam tape.
We stop the barrier 2 inches short of the sill plate — this meets code and keeps the area accessible for future termite treatment if it's ever needed. Every pillar is individually wrapped, sealed at the top, and properly overlapped to eliminate moisture entry points.
Dehumidification & Entry Point
Finally, we lock in a healthy environment. We install a 70 PPD dehumidifier with a built-in pump that drains directly into the sump basin. It's self-regulating and self-pumping, so it requires almost no maintenance from you.
We set it to hold 55% relative humidity — comfortably below the 60% threshold mold needs to grow — so the space simply can't support regrowth. It's positioned centrally for even air movement, unless a specific problem-moisture area calls for closer placement.
We finish by installing a new custom-framed crawl space door built from PVC board — rot-resistant, water-resistant, and mold-resistant. The door well is graded lower than the crawl space floor (or fitted with proper drainage) to eliminate water intrusion right at the entry point.